Friday, July 31, 2009

Remove Microsoft Windows Genuine Validation Check.

Hi, friends

You had installed the pirated Windows XP on your machine and now facing the Microsoft Windows Genuine validation Check message. NOW YOU GET RID OFF…..don’t worry read this blog and find the solution.

Options 1.


WIndows update(KB905474) if its still there.

then proceed in windows explorer to :

  • C:\WINDOWS\SoftwareDistribution\Download
  • Scan in detal all subfolders carefully reading every file and delete anything that is remotely connected to windows genuine advantage
  • next run regedit
  • search for wgalogon delete whole root directory when found.
  • then go to
  • C:\WINDOWS\system32
  • find wgatray.exe and wgalogon.dll
  • delete them both
  • this should solve those pesky notification windows at logon spalsh screen

Options 2.

There is an easy solution to this and I would like you to follow the steps below to fix the issue.
1. C:\Windows\Downloaded Program Files

  • Within that folder, remove any files or folders associated with .WGA

2. Safe Mode

  • Reboot your computer and as soon as Windows logs off, start repeatively tapping the F8 Key on your keyboard.
  • As soon as you see the Windows Advanced Startup options select Safe Mode within Safe Mode get yourself into these folders…
  • C:\Windows\System32 (Rename wgatray.exe to wgatrayold.exe)
  • C:\Windows\System32\dllcache (Rename wgatray.exe to wgatrayold.exe)
    Note: Dllcache is a hidden folder, to view hidden folders do the following, go to Start, Control Panel, Folder Options,
    Select the view Tab and under the Hidden Files option, select Show hidden files and folders

3. Safe Mode Registry

  • Click on Start, Run and within the open dialog box type regedit and click OK.
  • Within the Registry Editor navigate your self to
    HKEY_Local_Machine\Software\Microsoft\WindowsNT\CurrentVersion\Winlogon\Notify\WGALOGON
  • Right Click and Export the WGALOGON Folder (this should be saved onto your machine for backup purposes)
  • After Exporting the folder, DELETE the WGALOGON folder
  • After deleting close all applications and Restart your machine back to Normal Mode
After being prompt of a successful validation, restart your Machine.

Friday, July 17, 2009

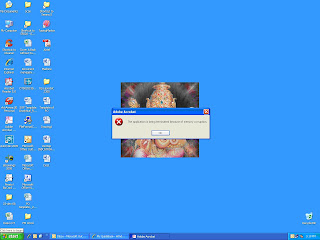
Error "the application is being terminated because of memory corruption" when you exit Acrobat 7 (on Windows)


Solution 1: Install the Acrobat 7.0.8 update.

If you have Acrobat 7.0, choose Help > Check For Updates Now to install the update. Alternately, you can download the update from the Adobe website at www.adobe.com/downloads/ .

Solution 2: Remove the files from theAcrobat Organizer folder.

When you remove files from the Acrobat Organizer folder, you force Acrobat to rebuild the Organizer database. This process replaces any damaged files in the Organizer that may be causing the error message.
To remove the files from the Acrobat Organizer folder:

1.Choose Start > Run.

2.In the Open text box, type:%UserProfile%\Application Data\Adobe\Acrobat
\7.0\Organizer70.

3.Delete or move all filesfrom this directory.

Solution3: Remove the files from the Updaterfolder.
You may receive this error message after a failed update, indicating that the files in the Updater folder are corrupted.

To remove the files from the Updater folder:

1. Choose Start > Run.

2. In the Open text box, type:%UserProfile%\Application Data\Adobe\Acrobat\7.0\Updater.

3. Delete or move all the files fromthis directory.

Saturday, July 11, 2009

Crack Windows Login Password

  1. Place your windows BOOTABLE CD in CDROM and restart the computer (CDROM should be first bootable device in BIOS)
  2. Keep your eyes on the screen for booting to your CD, it will be “Press any key to boot from CD”
  3. Once you get in, the first screen will indicate that setup is inspecting your system and loading files.
  4. when you get to the welcome to Setup screen, press ENTER to setup windows now
  5. The licensing agreement comes next – Press F8 to accept
  6. The next screen is the Setup screen which gives you the option to do a repair. It should read something like “if one of the following windows XP installation is damaged, Setup can try to repair it”


Use the up and down arrow key to select your XP installation (if you only have one, it should already be selected) and press R to begin the Repair Process.


  1. Let the repair run, setup will now check your disk and then start copying files which can take several minutes.
  2. Shortly after the copying files stage, you will be required to reboot(this will happen automatically – you will see a progress bar stating “Your computer will reboot in 15 seconds”
  3. During the reboot, do not make the MISTAK of “pressing any key” to boot from the CD again. Setup will resume automatically with the standard billboard screens and you will notice installing windows highlighted.
  4. Keep you eye on the lower left hand side of the screen and when you see the installing DEVICES progress bar, PRESS SHIFT+F10. This is the security hole; a command console will now open up giving you the potential for wide access to your system.
  5. At the prompt, type NUSRMGR.CPL and press Enter and Now Now…you have just graphical access to your user Accounts in the control panel.
  6. Now simply pick the account you need to change and remove or change password as you prefer. If you want to log on without having to enter your new password, you can type control userpasswords2 at the prompt and choose to log on without being asked for password. after you made your changes close the windows, exit the command box and continue on with the repair(have your Product key handy)
  7. Once the repair is done, you will be able to log on with new password (or without a password if you chose not to use one or if you chose bot to be asked a password)


Hi , Friends Please try it with Good Faith